How To Grow Loofah Plants & Harvest Your Own Natural Sponges

We are all familiar with loofah sponges, but you may not realize our natural bathroom exfoliators come from a luffa plant. These fibrous sponges are also sometimes mistaken for the ones from the ocean. Loofah sponges come from luffa plants, and you are in the right place for everything you need to know about how to grow loofah plants.
There are two different spellings of the plant; luffa or loofah. Any spelling is okay.
German biologist and botanist Johann Veslingus introduced the Genus name Luffa from 1598 to 16492. Luffa is easy to grow if you have a garden. You can also grow it indoors if you have a space that receives adequate sunlight.
This article provides a step-by-step guide for planting green loofah. It also explores ways to care for your growing plants and make your luffa sponges when luffa fruits are ready to harvest.
Related: If you’re here, you’re probably up for growing your own. However, should it all feel like a bit much, do click on to our article on eco-friendly loofah alternatives that provide plenty of options to shop for that aren’t the fake plastic variety.
What is a Loofah Plant?

The Loofah plant is from the plant family Cucurbitaceae. It is a close relative to gourd, squash, and cucumber. Originally called luffa, a genus name referring to many tropical and subtropical plants in the cucumber family. There are two popularly grown species of the gourd family: luffa acutangula and luffa aegyptiaca.
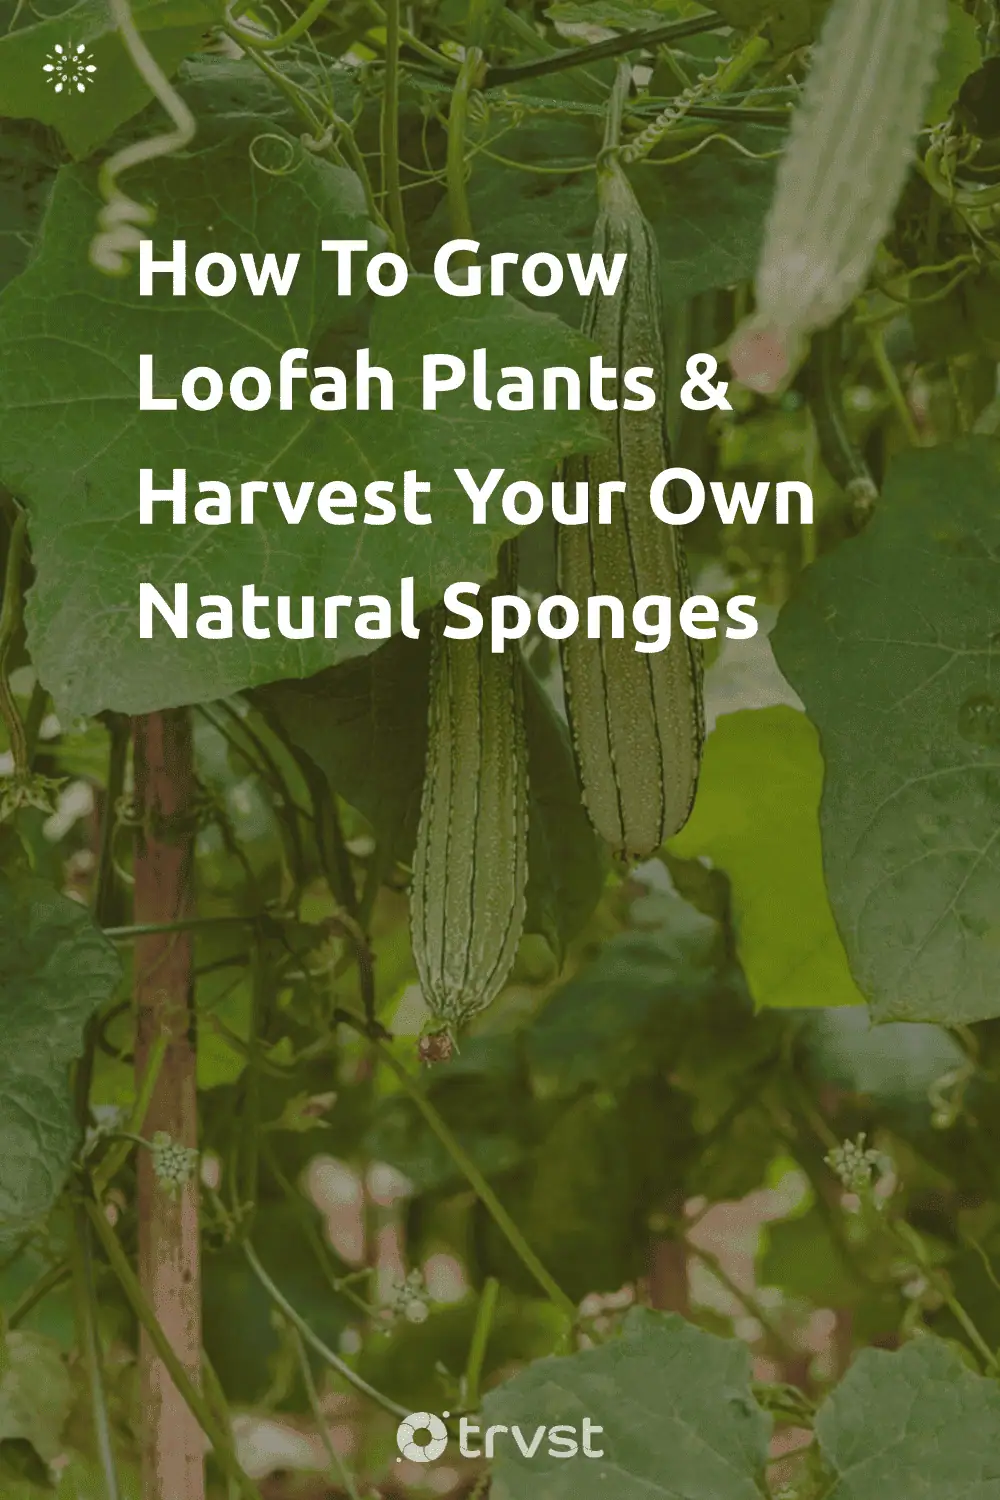
Luffa plants grow like vines. The luffa's stem, growing over 23 feet, is smooth and rubbed. A plant can produce 50 large green gourds in a single growing season. Male and female flowers grow on the stalks of a luffa plant, making it a monoecious plant. The flowers are yellow, while the loofah gourds are green, with a smooth texture.
Luffa leaves grow up to 5 inches long and 12 inches wide. The leaves are hairless with serrated edges and an acute-end lobe. Loofah gourds have various uses and usually grow up to 7 inches long. It got one of its names, sponge gourd, from one of its most prominent uses, washing.
Luffa plants prefer to grow in warm climate conditions. So, you will mostly find loofah plants in tropical Asia, Southern Central Asia, northern-eastern Australia, the South Pacific region, Africa, the United States, and American countries.
Types of Luffa Gourds
As mentioned earlier, there are two common species of loofah gourds. These species are the smooth luffa (luffa aegyptiaca) and angled luffa (luffa acutangula). Both luffa gourds have the same uses.
However, the physical features of each gourd differ. The angled loofah, also known as Chinese okra, ridged luffa, and ribbed gourd, is native to the subtropical region of Asia. However, it has also become a common plant in China, Southeast Asia, Japan, Egypt, and India.
The ridged loofah gourd doesn’t have a smooth surface. It has between 8 to 12 longitudinal ridges all over its green skin. The lines on the green gourd are dark green.
The other species, the smooth luffa (luffa aegyptiaca), is ridge-free. It has a smooth, green surface.
What Can We Use Loofah Gourds For?

All parts of a luffa fruit have their uses. You can use the pulp, peel, and seeds. The most popular use is drying the mature gourds for use as a sponge. Most sponges that are sold commercially are loofah sponges.
As the gourds mature, their endocarp grows into a fibrous network made of cellulose. This fibrous network forms the exfoliant we use to bathe, clean our shoes, and do the dishes. You can also use it to weave a mat and paint textures. We can also use loofah sponges as shock and sound absorbers and water filters.
You can also consume loofah fruit, which tastes a bit like summer squash. However, you can only eat it when it has not matured, as matured loofah tastes bitter, fibrous, and inedible. Many consider them a delicacy when they are still green and immature.
Loofah fans prepare them like other fruits from the gourd family, like cucumber, zucchini, and winter squash. Either you eat them raw or cooked.
Research shows that luffa plants improve health conditions like diabetes, jaundice, hemorrhoids, headache, ringworm infection, leprosy, and dysentery. Extracts from different plant parts have anticancer, antidiabetic, antioxidant, antibacterial, CNS depressant, immunomodulatory, and antiulcer elements.
Scientific research validates the ancient traditional medical uses of loofah1. The local habitat of Mahadevpur uses it to treat diabetes. People from Maharashtra use it to treat insect bites and swollen hemorrhoids. Also, the seed kernel treats dysentery, and the gourd juice works for headaches.
How to Grow Luffa Plants Using Luffa Seeds
1. Source your luffa seeds.
You must source the little black luffa seeds from a luffa fruit to grow your natural loofah sponges. Luffa seeds may also be available to purchase from a nearby nursery or garden center, or a search online will offer up options for delivery if there are none near you.
2. Prepare the area where you want to grow your luffa plant.
After selecting your seeds, prepare the space where you want to plant them. Get rid of weeds in your planting area and loosen the soil. Because luffa plants require a lot of sunlight, sowing seeds directly in the garden is better than starting seeds indoors. Further, successful transplanting is challenging to attain.
However, you can start your luffa plants indoors as long as you are confident they will get at least 6 hours of direct sunlight. Also, ensure the soil you want to use for planting is fertile and healthy. Your soil moisture must be consistent.
If need be, you can add compost from your compost bin to enrich the soil or add soil fertilizer. Nitrogen fertilizer, in particular, helps improve the growth of luffa plants as they both require and love lots of soil rich in nitrogen. Once you know your soil is great for planting, bury your luffa seeds lightly.
3. Prepare the black seeds for easy germination.
To make the germination of your loofah seeds easy, it's advisable to soak them in water first for 24 hours. Doing so makes the seed coat soft, increasing the chances of germination. You can soak the seeds in any water temperature that is not too hot or freezing cold.
You can also scarify the seeds to aid the germination process. Seed scarification damages the outer shells of seeds to aid the germination process. It creates a straightforward path for moisture to reach the seed’s embryo.
4. Plant loofah seeds at the start of the warm growing season.
You can start growing loofah towards the end of March and at the beginning of April. During this period, the frost has passed. Remember, luffa plants grow best in places where they receive lots of sunlight.
Add 3 to 4 seeds to each mound of tilled soil. Ensure that there is adequate spacing between each luffa plant. Leave about 75 cm spaces in between each plant. Remember to keep the soil consistently moist. You can only grow luffa in well-drained soil, not too wet or dry.
To supply the seed nutrients, lock in moisture and heat, and cover the top of the soil with a thin layer of compost. The luffa seeds should germinate around 14 to 21 days. After sprouting occurs, separate the loofah seedlings, placing a single seedling per soil mound.
5. Prepare a structure for your growing loofah.
Loofah sponge plants grow like vigorous vines. You need a structure that allows luffa vines to spread out and grow upwards. Grow luffa plants near a sturdy trellis, pergola, or any other similar structure.
Growing vertically protects the plants from pests and diseases. It is very easy for plant stems to catch diseases when they grow in the ground.
Planting Luffa Seedlings in a Container and Transplanting Them to the Garden Floor
Not everyone can access gardens, but that shouldn’t stop you from planting your loofah sponge. You can plant your natural sponges in a container and place them in areas with adequate heat and sunlight in your home. The same steps required for growing a luffa sponge in a garden apply to growing indoors.
However, here are some additional steps to growing loofah sponges indoors:
1. Plant in a deep container.
Be mindful of the size and depth of the container you choose to grow your luffa plants. It must be deep enough for their roots to stretch and for proper soil drainage.
Your desired container should be over 12 inches deep, but it is advisable to use containers about 20 inches deep. Then, plant about 5mm deep.
2. Make drainage holes at the bottom of the container to allow proper soil drainage.
The right soil to grow luffa should have a balanced moisture content. It shouldn't be too wet or completely dry. The drainage holes allow excess water to flow away as you water your growing loofah, maintaining consistent soil moisture.
3. Place the container in a position that guarantees direct sunlight exposure.
As mentioned, the vegetable gourd plant won't survive without adequate sunlight. So, ensure you have a spot around your house that will provide 6 hours of sunlight for your loofah sponge seedling.
You can find a spot with direct sunlight on your balcony or backyard. Place your loofah plant there and water it regularly.
4. Be careful not to over-water the growing luffa.
Be cautious of the rate at which you water your luffa seedlings. Do not over-water it, as it will lead to soggy soil. Remember that your seedling needs loose and well-drained soil to thrive.
5. Place your plant near a sturdy vertical structure
Like growing on a garden bed, you'll need a strong trellis. The trellis or arbor provides support for your loofah vines to grow along.
6. A heating mat can speed up the sprouting process of loofah seedlings.
Luffa plants love the heat. So increasing the sources of the heat they get is only right. Place a heating mat on the floor and place your loofah vase on it. They germinate easily when the temperature of the heating mat is 85°F. The seeds germinate quickly within a week.
The heating pads enable you to grow loofah before the frost has passed. You can use the heating pads until the start of the growing season and then transplant the seedlings.
Transplanting Luffa Seedlings
Transplanting luffa from indoor to outdoor beds requires patience and care, especially for those who started growing their luffa during the cold season. You can transplant your loofah sponge when it grows its first set of leaves, and it is big enough to handle without damaging it.
First, harden your plant before transplanting it in the garden. Hardening is simply acclimatizing them to outdoor climate conditions. To do this, take the plants outside daily for about two weeks before transplanting.
You can initially put it out for an hour and then extend the time until the plant can stay outdoors. Then, dig the spot to transfer the seedling 15mm deep. Plant the seedling carefully and cover it with humus.
How to Care for a Growing Luffa Plant
A growing luffa requires regular maintenance checks to ensure it grows properly. You can not just plant the black seeds without monitoring their progress, especially if you are not planting outdoors directly.
Some ways to care for growing luffa plants are:
Fertilization
Adding fertilizers to the soil before planting and consistently during plant growth produces big loofah gourds. They especially need high amounts of nitrogen in the soil. So, add nitrogen fertilizer to the plant roots a few times before it becomes ripe.
Use a half dose of nitrogen fertilizer every few weeks if your plant isn't growing well. You can also use slow-release fertilizer after transplanting and when it blooms flowers.
Pruning
Whether you let your plant grow on the ground or against a vertical support structure, weeding is essential. Keeping your vines off the ground is better for avoiding diseases and pests. However, you still need to prune the vines growing on support structures.
Get rid of weak and infected vines. Also, cut off entangled vibes to give room for air circulation. Crowded vines often produce small and misshapen dishrag gourd. If they have extended climate conditions, clip off the flower of the first few blooms. This allows the plant to grow more mature before it produces fruits.
Hand pollination
Honey bees and other insects help pollinate luffa female and male flowers. However, it is necessary to do it manually to avoid the loss of many unpollinated female flowers.
Hand pollination is simple and easy. Just pluck a male yellow flower and rub it over a female yellow flower to transfer pollen. You can also use a soft brush to transfer pollen from one flower to another. You can use one male flower to pollinate a couple of female flowers.
An easy way to recognize a male flower is its lack of bulbous growth just below it. A female flower has a bulb-shaped end which the flower blooms from.
Pest and diseases
Luffa plants are prone to plant diseases like powdery mildew and downy mildew. Powdery mildew occurs on loofah because of the reproduction of fungal spores on the leaves of the plants.
Avoid this by only watering your plants at the root level. Don't water the stems and the leaves. Good air circulation amidst the vines will also prevent powdery mildew. You can cut out the parts affected by mildew and apply fungicide to the affected area to prevent it from spreading.
Pests common to luffa plants are pumpkin flies, spider mites, and cucumber beetles. Using row covers and dusting the plants with kaolin clay prevents infestation. Always check your plants for signs of these pests and their eggs so you can get rid of them before they damage the plants.
Harvesting Luffa Fruit
Harvesting the vegetable sponge can occur at different times between two months and six months. The harvest time depends on what you want to use the fruit for.
If you want edible fruit, you can harvest it two months after you plant. The gourds are around 6 inches long two months after planting. They are green and look like weirdly shaped cucumbers. As the growth progresses into the third and fourth month, the gourd becomes longer, and the dark lines are more pronounced.
As the fruit approaches six months, the outer skin changes from green to brown as it dries out. The fibrous flesh inside the shell has also dried, and you can hear the seeds rattle. We know the dried fibrous flesh as a luffa sponge.
How to Prepare Luffa Sponges from a Mature Luffa Gourd

You can only source what we know as your luffa sponge from mature fruits. After cutting the gourd two inches out of the stem, soak the fibrous sponge in warm water. Let it soak for up to 20 minutes or until the skin separates.
Then, separate the seeds by shaking the fruit until everything is out. Also, remove any pulp residue present in the fruit. After separating the non-fibrous content, the next thing is to soak it in bleach for an hour. Soaking it in bleach cleans it.
Rinse it after one hour and shake it vigorously to remove excess water. Last, dry it in a well-aired and warm place. Ensure it is completely dry before storing or using it; and there you have it, your own loofah sponge grown at home.
Conclusion
There are multiple uses for luffa fruits. You can eat immature fruits like you eat cucumber and zucchini. The most popular use of matured luffa fruits is as a sponge for scrubbing pots, dishes, and bathing.
As someone practicing a zero-waste lifestyle, planting loofah in your garden or your background will provide you with natural sponges. Unfortunately, not everyone lives in conditions that allow for the growth of loofah.
But you can still use natural loofah sponges because various brands sell them. You can check our eco-friendly loofah recommendations to purchase from sustainable brands.
Glossary Terms:
| 1 | Shendge, P. N., & Belemkar, S. (2018). Therapeutic Potential of Luffa acutangula: A Review on Its Traditional Uses, Phytochemistry, Pharmacology and Toxicological Aspects. Frontiers in Pharmacology, 9. |
| 2 | Eisendrath, E. R. (1961). Portraits of Plants. A Limited Study of the "Icones". Annals of the Missouri Botanical Garden, 291-327. |
Jen’s a passionate environmentalist and sustainability expert. With a science degree from Babcock University Jen loves applying her research skills to craft editorial that connects with our global changemaker and readership audiences centered around topics including zero waste, sustainability, climate change, and biodiversity.
Elsewhere Jen’s interests include the role that future technology and data have in helping us solve some of the planet’s biggest challenges.